Showing posts with label steel. Show all posts

Chain& plate armor reborn

Oh boy its been a while since I posted about this project.

Well then, with the weather warming up, its back on track.


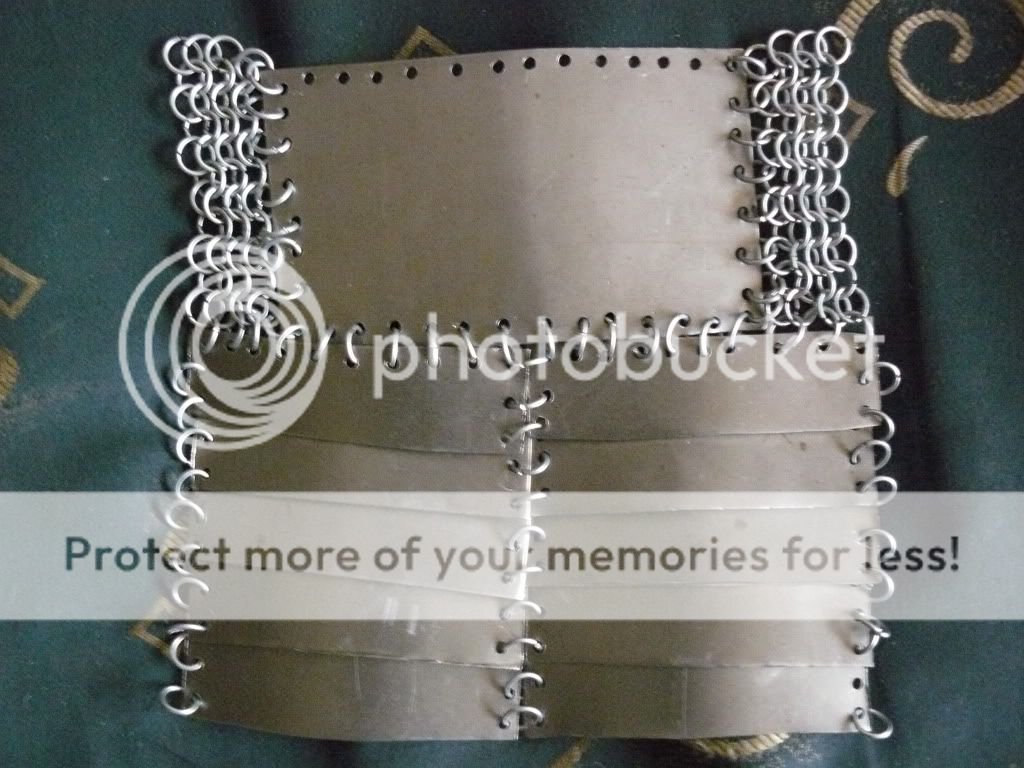
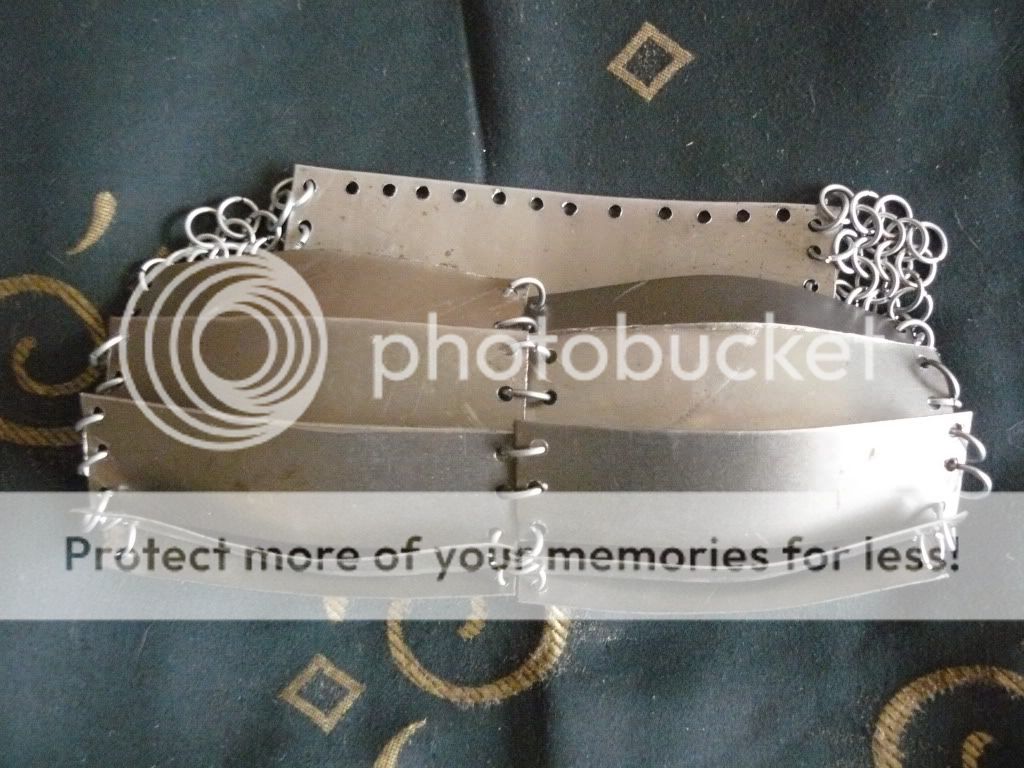
Not too much to show yet since its not yet wearable. I finished the front and most of the back. The belly plate has been coated to avoid rust. Once I'm done with the back, I can try it on. A far more...streamlined build than the previous one. There is less plate and more chainmaille but its going to be easier to wear and put on . Last one involved way too many straps...

Battle of the Nations

Because you know, you need some place to bend all those tin cans, unless you plan on keeping them gathering dust and rust in some corner.


What IS the Battle of the Nations? Taking the name from that OTHER Battle of the Nations ,
its more or less an international medieval full contact combat tournament. Its not reenactment - more like LARP/SCA/WWF with swords and plate armor, but non the less - its pretty awesome in its own right. There are participating teams from half a dozen or more countries in several trials - 1 on 1, 5 on 5, full 21 on 21 etc.

There are teams from all over the world but the regulations and requirements are high.
 
For more info you can visit this Ukrainian site http://www.battleofthenations.com.ua/
It has english version as well.

You can also watch this short episode series on medievalists.net
http://www.medievalists.net/2011/11/11/battle-of-the-nations-tv-series/

Plate armor Tip 1

Well I generally wanted to shy away from posts discussing proper plate armor, since i'm not doing any at the moment, but times goes by.

Now, today's post is again courtesy of maister Aule.

2 years ago he made a rather awesome winged helm for a buddy of mine.

It bears remarkable similarity to the steel plate armor helm from Skyrim, except there is no face plate.(Mind you thats from before Skyrim came out)


There are no pattern blueprints or full making process pics available or i'd give em. None the less there is something useful to be learned from here.
Thats two shots from the WIP on the helm.  The parts are shaped, the holes are drilled, however - they are not riveted yet. Its being held by bolts. Very useful if you have to make adjustments, which you probably will, with any custom project. Admittedly I hadn't thought about this before as with all simple and obvious things. It would have saved me a lot of trouble. So yeah - When working on plate armor with lots of riveting? Don't hammer out immediately, grab a bag of bolts first.

4 in 1 japanese chainmail

Been a while since I made one of these clips :)

Right

4in1 japanese chainmail armour is quite simple, you can't really make a mistake in it. It lacks the density and strength of 4in1 european chain. On the other hand its lighter, and quite easy and fast to produce.
You can use one, or two types of links depending on preferances.

Here is several variants(one of them is from the video)


The warrior kitten


Beware, beware for he is coming....
And - he's not named yet. I couldn't  decide on a name, so I'll set up a poll for this. Also taking suggestions in the comments.
Finally finished my latest mini project - the awesome warrior kitten, ready to rise up to all challenges. 

Moderately difficult project. Nothing too tiresome for my eyes. Used gold plated links. As with all my projects the armor is removable with ease, and since its on a life size plushie it could on theory be placed on a real kitten, but I have no intention to try something like this. 

Anyway - here's the rest of the photos. 


In other news...I'm not too good. Its my last semester in university. After that its diploma time and then bye bye. And i'm not very certain i want to be a lawyer anymore - kinda freaking out because of all this....

On micro maille - tools, tips, and basics.

Right. Now, after doing a good amount of projects involving it, its time to write in depth about micromaille.


Micro maille or nanomaille or however you decide to call it is chainmail made by rings ranging from quite small to microscopic. It is by all means NOT something a newbie should try to tackle. First things first - supplies.

Supplies for micromaille can be bought at a jeweller's supply store - a real one or online. Usually you will find copper with some plating - in my case gold-plated, rhodium plated, bronze plated copper rings, but if you have the money - you can even do real silver for example. I don't think anyone has the money to do real gold...
The links will be moderately expensive too - for the amount of money needed for a chainmail shirt, you will barely get enough to fill in your hand.


 If you need something specific, because the stores will only have preset sizes, you can buy wire and make your own links. The wire is sold per meter usually(at least where I buy) and could be well under 1mm thick.


As an example - here are microscopic links I made by myself - so tiny I could fit them under my fingernail.


2 TOOLS


First of all you will need the smallest pliers you can find and then some! Those are pretty small but they are still not very comfortable for the job - I'm thinking about customizing them a bit. The nail clipper? Well...Its what I used to cut the home made microlinks above.

A magnifying glass of some sorts, or a monocle is also a good idea - you will ruin your eyes in no time otherwise. You won't be able to even do anything if you have eyesight problems in the first place, without one of these.


TIPS

VERY IMPORTANT!
And related to the above mentioned thing about the magnifying glass. ONLY WORK AT GOOD DAYLIGHT! Don't try to work on a lamp light or if its dark! Just don't! You will be looking at an optometry cabinet in no time. Its just not worth putting on glasses for this, believe me.

Forget about speedweaving. The rings are so small the only way to actually work is 1 by 1. Its impossible to grasp them by hand properly and they tend to slip a lot, so just do it 1 by 1.

Get something with a lot of tiny boxes. Like a fisherman's case or a tool box or something. You will need somewhere to keep those links sorted out and safe from getting spilled all over the floor. Good luck gathering them if you do!

That's all I can think of for now but I will add more later probably. Might split this into several posts too.

The golden bikini of awesomeness(and win)

Been a while since I made a one these! Most fun you can have for a couple of hours indeed, especially the fitting&measuring part.


Needless to say there isn't nearly as much fun without making some slightly naughty photos. However I gotta keep this place following the rules so  PG13+ warning here.


Unfortunately, now I'm going to bore you with design notes. This is not my first piece of chainmail bikini, but definitely the best so far. Design wise - its simple. I attached the cups to an ordinary bra, which helped a lot with putting it on and off and keeping it comfortable. I used gold plated rings for jewellery which was also a good idea. I've made chainmail bikini from the same steel links I use for armor, and while the results are ok, its  a good several hundred grams, which is simply unsuitable. These copper links weight much less. Work time is just several hours with a price tag of supplies about 10$. If you feel like it, you can surprise your girlfriend too with one of these in just 1 afternoon.

The Ringlord

No, not Lord of the Rings, the Ringlord. And believe me, the name is no boast.

For the people who have the money but don't have the time to do home experiments, or those who want something exotic, there is the Ringlord.

http://theringlord.com/cart/default.asp

Its based in Canada and has...well everything. The Ringlord sells all you could possibly need for making chainmaille of all kinds and a few other things as well.One of my minor dreams involves driving up to the place with a big truck, several strong lads and grabbing everything thats not bolted down and we'd carry bolt cutters just in case.

Starting with the tools - it has all the kinds of pliers you'd need, the wire cutters and the saws for the coils, mandrels, more miscellaneous stuff like mini scales to calculate weight, welders, tumblers etc.

As far as products go it sells wire, coils and cut rings from trivial materials like copper, galvanized and stainless steel to exotic ones like brass, inconel, nickel silver, gold, niobium and titanium. The very prospect of making a titanium maille shirt is definitely tempting. The Ringlord is also responsible for the small leaf like scalemail that can be seen around the web - it makes them. Finally they also have finished maille shirts and sheets of chainmaille from most of the above mentioned materials. All in all the price range for most products is what i'd call acceptable. I've never personally purchased but I've heard a lot of positive reviews, and well let's be honest, there is no other like it. If you are on a tight budget, well you can daydream like me. But if you can afford it or its something special you want, look no further.
 
All in all - seriously just go have a look.
http://theringlord.com/cart/default.asp

Chain& Plate armor Second serving


Right, now that the prototype is done and I got the basics of it, its time to start the new line of trendy and fashionable armor sets. I've started two at once to show my obvious dedication to hard work....Eh, excuse me, I need to trim my nose...Funny thing how quickly it can grow eh? Well actually its because I found parts that can help me start two at once.


Now this pair will be a little different, and that difference will be mostly due to an added belly plate. Recycling is the new rule of cool and while my own fashion sense is stuck around 1100 AD that does not mean I can't improvise, so yeah - I recycled those belly plates from what used to be kneecap guards. They don't look like much, having caught some rust and a bit misshapen since they were not planished, but for the current cause - it will do.


Whats important to note here however, is that unlike the simpler square plates used for the last set, these involve some actual hammering. Now I didn't plan to write about whitesmithing(no fire) so early on the blog so I'll just give a few basics.

The tools you will need here are above all - good hammers. Here you can see a ballpeen hammer you can probably find in the nearest handyman store. Next to it, is my own dishing hammer - I had it custom made for the job. The head is much less curved than the ballpeen. The ballpeen will still do if there is no alternative.
The other thing you'd need is a dishing stump. That could be an actual wooden stump with a oval hole on it, where you can shape the metal or you can use something else - like a sandbag. Right now I don't have a dishing stump, since my old one is now firewood.

Chain&plate Reasonable female armor volume 2

Ok the prototype turkish chain &plate mail is done, next ones are started already. All the basic ideas are set, I just need to get my lazy self to work.


Its not the best fit admittedly  its slightly too big for her. An arming doublet will fix that.


 OK, to sum it up. 

How to make one. First - the tools.
You need all the basic chainmaille tools  and material - pliers, cutter etc. to get the links.
You need a good drill - not the most expensive one but not the cheapest that will break in no time - you will be using it a lot. At least 2-3 spare drilling heads aint a bad idea. I broke one already.

You need either a throatless shear or a jigsaw to cut the plates. Another option which I've never explored is to get it cut by laser in some machineshop. Its available, and doable, but I've never tried it so I got no experience on the money involved and what you will get in the end. As far as I've heard the money depends on the number of cuts the laser does but I really can't say. If anyone tries this, tell me what you got.

Anyway, if its a one time gig, go for the jigsaw since its easier to get one and it will do, though you need to be careful with it - googles, gloves and basic safety folks! 

If its not a one time gig or you can get one easily - go for the throatless shear, yes I said it before, I will say it again. Those things are wonderful. The jigsaw is noisy(can't use in residential area) and you will need half a dozen discs or more since we are talking about a lot of cuts not to mention electricity  and safety gear. The shear involves more manual labour indeed - but seriously if you've picked this as a hobby you should not be afraid of manual labour. Its a bit slower too but apart from that its the obvious choice for anyone who wants to do more than 1-2 things because its a one time investment with almost 0 maintenance while jigsaw discs look cheap only until you've ran through 50 or more.


Finally you need sheet metal. There are many possible sources, for all its worth you can chop up a tin bucket. Just check that its around 1mm thick -too thin sheets won't do, too thick will be unnecessarily heavy and hard to punch holes into. I used left-overs & scraps from the workshop where they let us do our stuff, so its mixed gauges up there. Its not the best idea because of the previously mentioned piece of hardened steel that almost cost me my drill. Best option is to simply buy sheet metal from a warehouse. Thus you know what you are going to get. Of course that means a car to get it back home.

Chain&plate armor progress report 3

Right, mind you thats from several hours ago, I've started the sleeves now. I'll adjust the sides though, not very comfortable. Another note, avoid scrap metal as a whole. You never know if its not hardened steel under that thin coat of rust. I nearly broke my drill and they don't grow on trees.


My gf was here to take the photos, but this time she refused to put the armor on :). Instead, she opted to try and make something for herself.


Chain&plate armor progress report 2


Right, just a small progress report here. I got shoulder straps and the back plates done. Its wearable at this point. I'm already making notes for the actual production model. The lower back can be covered with plates easily, that leaves only the 1/4 of the torso - the belly covered with maille only, and the 2 sides of course. Can't use scrap though, I'll need a big sheet for this, since, as I found out, a large quantity of similar plates will be better than several types&sizes. That means finding a car and so on...annoying.

Chain&plate armor progressing


Right, so that's a nearly finished frontal section, next i need to do the back, the shoulder straps and the sides. sleeves will be for the last. Ran out of sheet metal though.

Few words of advice here for those following in. Sheet metal will ****** cut you. Use gloves all the time. And you won't find it in the Tools4Us, you need a warehouse, unlike the wire.

Chain&plate - time for mass production

Recently I've started a rather big project here - making munitions armor - that is fast to produce average quality stuff from the "one size fits nobody" cathegory. While maille is good, its slow to make - a set taking several weeks to produce. I will need a whole year to equip a squad of 10. So I went on with something different, which is easier as a whole, though it takes a bit more instruments.


Chain&plate armor is made from small overlapping plates, joined together with rings. Its not dissimilar to lamellars, scale armor and brigantines, except that the plates here are held together by rings, not by rivets or laces. Its a typically eastern design, as the local reenactors from Chigot would say - "Turkish job".

This here is a test piece made for about 1 hour and a half, hopefully soon to become the full prototype. Right now it covers the chest, and I will stretch it a bit more to cover the abdomen and then wrap with chainmaille. The full kit will look like a weird hybrid between a roman lorica segmentata and a lorica hamata.


Chain& plate is surprisingly easy to make requiring only a bit more in terms of tools and supplies. A drill is needed to make the holes,  and sheet metal of at least 1mm thickness for the plates. Even scraps will do as you can cut them up into small plates. To cut sheet metal, a throatless shear will be your best friend.

Here is what they look like:
Of course those are rare to find and expensive to buy so a jigsaw is an acceptable substitute.


Chain&plate armor is quite maneuverable and light too. It bends easily both ways. You have to pay a bit more attention of course - with maille worst that can happen is losing a few strands of hair - with plate you got sharp edges that must be filed away, and you should make sure its not close enough to your throat to actually cut you if you make a backflip or something.


Chopped up plates, ready for rust cleaning and drilling.

It terms of speed, it took me 1 hour to cut 30-40 plates from pieces of scrap, and another 1.5 to make 1/3 of a torso front by myself. With a couple of friends, it will be easy to make an awful lot of these.

Chainmaille Turtle

Ok, so in the comments on the previous post, Razzy asked for a turtle. Now being such a nice guy as I am(NOT) I made him one.


Well, like with the puppy it takes a bit of an artistic eye to see the animal of course. I made it by modifying one of my Celtic stars. What I can do here, is try and secure the shell tighter to the body, bit of a problem so far, but I will try to solve it soon. Used the gold, and copper plated rings for it. Taking more suggestions on! Come on, I don't bite, and its not as if I want you to pay for it or something, just keep it simple - no Taj Mahal/ Big Ben/ Wall Street/ whatever made from chainmaille.

I promise to do my best.
Older Posts ►
 

Copyright 2015 Drunkethic: steel Template by Drunkethic Template. Powered by Blogger