Showing posts with label homemade. Show all posts

Mini medieval crossbow model

Again with permission here's another of maister Aule's works. Following the same design and steps in his 15th century crossbow guide he made a miniature version. Photo quality is a bit bad, but you can see what's what on the big crossbow guide.


Here it is, half way through assembly - the wooden parts are carved out already, same goes for the lever and nut.
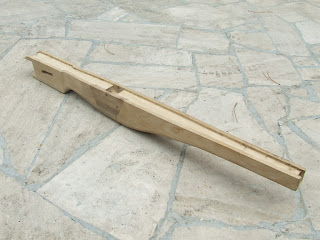
 Close shot of the body.
 Another shot of all the parts before assembly.
 Here it is, there is just no string attached yet.
Close shot of the trigger lever and nut.

 And finally the finished mini medieval crossbow next to a Nokia.
Here it is loaded for bear.
 
 And here it is test fired on a Suchard chocolates box. I wonder if there is a deeper subtle message in here? We might may never know.

 As you can see, its the bane of all chocolate boxes.

Home brewed Mead - recipe 1

Right assuming we all got our chainmail and our round shields set all that is left is to find some wenches and something proper to drink. Now  - beer is the obvious first choice but hardly the only one - if you are willing - you can try brewing mead.

There are many recipes depending on what exactly do you want to get for your final product, I will write down as many as I can find here in a series of posts, detailing their differences in flavour, taste, ingredients and making.

One thing that rings true for all of them is that this will be a long term investment - brewing will take several months, so you should also consider making a sizeable batch  too. It will also require a few things you may have a better luck finding in your granma's cellar - namely the jugs.

Now without further ado - home made mead recipe number 1
   
Ingredients :
8-10 lbs pure honey for light, delicate Mead or 12-13 for medium sweet Mead or
15-16 lbs for very sweet or alcoholic Mead.
4-5 gallons purified spring water (not distilled)
3 tablespoons of yeast nutrient (or 5 tablets)
1 tablespoon acid blend (combination malic/citric acid)
5-7 oz. sliced fresh ginger root (1 finger's length)

POSSIBLE EXTRAS - just for spicing it up
1/4 tablespoon fresh rosemary
5-6 whole cloves
lime/orange peels
1-2 vanilla beans
cinnamon/nutmeg
crushed fruit (peaches, strawberries, grapes, blueberries - you can experiment yourself here)
1 tablespoon Irish Moss to clarify Mead
OR
1/2 tablespoon clear gelatin to clarify Mead
1 packet of yeast - either champagne or ale yeast.

Heat The water for 10-15 minutes until its boiling. Then stir in honey, yeast
nutrients, acid blend, and whatever spices you picked ( ginger, vanilla, cinnamon,
nutmeg, etc.). The  mix stays like that for another 10-15 minutes,
(overcooking removes too much honey flavour so you can turn down the heat ). Skim off the foam as needed
should be 2-3 times. After 15 minutes, add Irish
Moss or clear gelatin to clarify the mead. After last skimming, turn off the heat,
add crushed fruit if you want to, and let it steep 15-30 minutes while allowing the mead to
cool and clarify. After it begins to clear, strain off the fruit with
hand skimmer and pour the mead through strainer funnel into a 5 gallon glass
carboy jug. Let it cool down to room temperature for about 24h.
After 24h warm up 1 cup of mead(microwave works for this), stir in 1 packet of yeast - its important what you picked as
it will affect the final product and leave it for 5-15 min to allow the yeast to start working.
Add the mead/yeast mix to the jug and swirl it around.

Place run-off tube in stopper of bottle, with other end of tube in large
bowl or bottle to capture "blow-off" froth. Let mead sit undisturbed 7
days in cool, dark area. After initial violent fermenting slows down
and mead begins to settle, rack off (siphon off) good mead into clean
sterilized jug, leaving all sediment in bottom of first jug. Attach
airlock to this secondary carboy. After 4-6 months, mead will clear.
During this time, if more sediment forms on bottom, good mead can be
racked off again to another clean sterilized jug.
When you are bottling in order to add carbonation you can put a quarter of a tablespoon of white sugar per 12 oz.
or stir in 1/2 to 1 lb raw honey per 5 gallons of mead(dissolve it first with mead or pure water)


My repeating crossbow

Well then, since we are still on the crossbow thematic - Thats my repeating crossbow  with pump action mechanism. We made it quite a while ago. Well it wasn't me either - the woodwork was done by a carpenter, the trigger by a machine shop worker. Now i don't have the schematics since it wasn't done by me( i was mostly observer), and i can't disassemble it entirely - the trigger is screwed in, but i will take a photo session to show how the parts go.
Its very simple and easier to make than the the lever action crossbow - the chinese chu ko ni. A bit lacking in power but thats mostly because well - none of us knows how exactly to dry wood for bows, and it takes both hands to cock it.
 Magazine holds a good half a dozen bolts though you can stuff in more(I don't overload it).

Here's a video of it working - firing a 5 bolt clip.

Another homemade medieval crossbow guide part3/3

Last part.
Part 1/3
Part 2/3


This part will show in detail how to make the nut of the crossbow, the trigger lever, and partial assembly and finished product. What's missing is full assembly tutorial and the making of the bow itself.


Now the nut is finished, and its time to make the second part of the trigger mechanism - the lever.


Unfortunately the photos for the lever are insufficient.

 Finally the body is polished and assembly can begin.

The finished crossbow.

As you can see from the date, this is just a few months old.

Another homemade medieval crossbow guide part 2/3

Continuing from here. Another homemade crossbow 1/3


Now the holes for the trigger and the nut are being trimmed.


  And the nut is tested for good positioning and smooth movement.Thats kinda important - if the nut is not moving smooth it might misfire or worse. 


Medieval crossbow guide

This is NOT made by me nor do I take credit, but it comes from a certain hungarian who will probably read this soon anyway. This is a (very picture heavy) guide on making a moderately powerful medieval crossbow.

First the lever for the trigger.

Now the piece from which the nut will be made - its from bone. Feel free to improvise.
Side view of the body - still a lump of wood, but you can see how the lever goes.

Top view.


After shaping the body.


Preparing the front.


Another look at the trigger, some extra holes& carving done.


Now the actual mechanism.
 There is a small steel spike here to stop the nut from being worn out by the lever.


The bow.

The holding piece.
 The parts after some finishing touches and finally - assembly.


This is what the end of the string looks like. 

Now this is for a fairly low power crossbow and the design can be modded for more durability. Anyone who tries this only needs to know the mechanical principles after all. I for once would add a thumb holder for the bolts.
Older Posts ►
 

Copyright 2015 Drunkethic: homemade Template by Drunkethic Template. Powered by Blogger